
Mac won’t boot? Fancy testing out the latest macOS beta? You should try running your Mac from an external drive.
It’s a good way to help solve a lot of problems, and is easier to set up than you might expect. It works on any machine, from a MacBook Pro to an old iMac. So read on to find out to make your Mac boot from a USB drive.
Why Boot macOS From USB?
There are a few good reasons to boot macOS from a USB drive.
Before you ask for help, please try the troubleshooting steps below. Macs' support for booting from USB volumes has always been second class to. If your backup volume showed up in the Option key startup disk selection. I have an external USB SSD install with Windows 10. On my MacBook Pro 15' mid 2014 I can press option on boot and it will show up and I can boot to Windows. However when I try on my MacBook Air 13' early 2015, pressing option on boot doesn't show up the external USB SSD, only macOS partition is shown.
The most likely one is that your Mac won’t start, or has another problem. Booting from an external drive gets around this. It enables you to access the contents of your internal drive—assuming it still works and isn’t encrypted—and it helps you to repair your Mac disk with Disk Utility and other troubleshooting tools.
Another reason is so you can run different versions of macOS. This is particularly important if you’ve got crucial apps that don’t run on the latest version. It’s common for older apps to eventually become incompatible.
And similarly, it allows you to test a new version before you make the decision to upgrade. This includes trying the beta version, bugs and all. It might not be stable enough to use as your daily driver, so installing the Mac beta on an external drive lets you test it risk-free.
Note that our guide below will not build you a “Hackintosh” that can run macOS on a machine built for Windows. That requires a very different process.
What You Need
To run macOS off a USB drive, you need a drive of at least 32GB for casual use. We’d recommend one a lot larger if you intend to use it seriously.
Fast hardware is also important. This means USB 3, and either a flash drive with fast read and write speeds, or a solid state drive instead of a hard drive. You will notice a difference if your hardware is not fast enough.
You also need a copy of macOS.
How to Download macOS
There are several different ways to get a copy of macOS to install on your USB drive.
- If your Mac is running a version of macOS older than Mojave, you can download many versions through the App Store. Just go to your Purchased tab and you should see them listed among your other apps.
- In case your Purchased tab doesn’t contain the version you’re looking for, you might be able to get it via the Apple website. For example, you can download Sierra and download High Sierra from its site.
- If you’ve upgraded to Mojave (or later), unfortunately the only legal way to get the old operating systems is to buy them. Alternatively, you might still have copies on an old installation disk.
- To download the macOS beta, you first need to sign up for the Apple Beta Software Program.
When you choose a version that’s more than a few years older than what you’re currently running on your Mac you might encounter an error message saying that it’s too old to install. If this happens, there is a solution.
Head over to our guide on how to install macOS from USB How to Install macOS From USBWant to install macOS from a USB drive? We'll walk you through this alternative method for installing macOS. Read More , where you’ll find full instructions. This requires you to use the Terminal app. It’s a bit more hands-on, but still easy to follow.
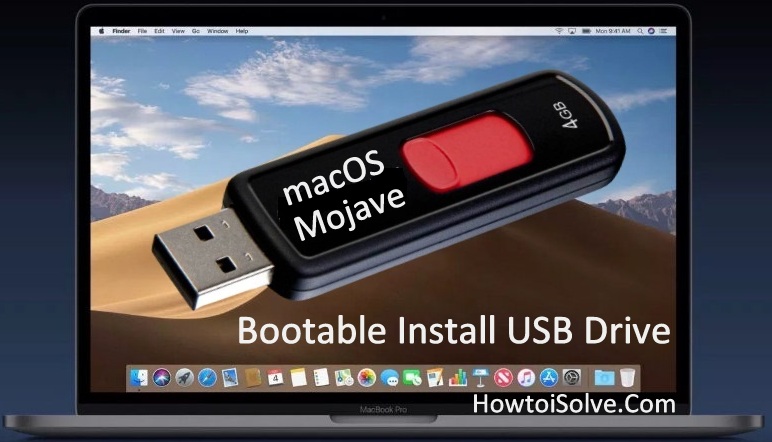
Install macOS on a USB Drive
So now you’re ready to set up your USB drive to boot to macOS. First up, you need to format your drive. Connect it to your computer and launch Disk Utility.
Locate your drive in the left-hand column, where you’ll see both the device and the volume. Shareware ifotosoft photo viewer for mac windows 10. On newer versions of macOS, you might need to go to View > Show All Devices to make this show up.
Eject the volume by clicking the Eject button alongside it. Now select the device name.
Go to Erase and type a name for the drive. Set Format to Mac OS Extended (Journaled), and set Scheme to GUID Partition Map. Now click Erase. Remember that this will wipe everything on your drive.
Now download the version of macOS you want to use. If you get it from the App Store, it’ll save to your Applications folder. Shadowsocks mac client download. Double-click this to get started.
Click through the license agreement. You’ll then be asked where you want to install the operating system. Click Show All Disks and select your external drive. Choose Install, enter your password, and it’ll begin.
All the necessary files will copy over to your drive first, which might take up to 10 minutes. Then your Mac will shut down and the full installation will start. This takes a while, and the time estimate is not necessarily accurate.
In our case the estimate was 15 minutes, but the process was still chugging away after half an hour. Faster hardware is definitely a plus here.
When it’s done your, Mac will reboot into your new, pristine copy of macOS. Now you just need to set it up as you normally would. Connect to Wi-Fi, add your Apple ID info, and so on. It’s ready to go.
How to Run macOS From an External Drive
Next time you start your computer, it might revert back to booting from your internal hard drive. You’ve got two options to boot to your external drive.
Go to System Preferences > Startup Disk. Click the lock and enter your password to change the settings. Select your USB drive from the list and click Restart.
The second method is to turn on your computer and hold down the Option key. After a short delay you’ll see a list of available drives, including both internal and external ones. Choose the external drive and hit Enter to continue booting.
Both of these methods set the external drive as the default. Of course, you can only boot from an external drive when it’s connected. Therefore you can simply unplug it whenever you want to boot to your internal drive instead.
There’s one final (and important) point to know. When running macOS off an external drive, you still have to shut it down in the normal way. Don’t just whip out the USB drive, or try to eject it somehow. This could cause you to corrupt your data. You need a full computer reboot to switch from one drive to the other.
Fix Mac Boot Problems
The entire process of setting your Mac to boot from USB should take around half an hour at most. Install it on a fast SSD and you’ve got a usable dual-boot system on your hands. Or you could install macOS on a flash drive, stick it in a drawer, and keep it for emergencies.
Booting your Mac from a USB drive gives you a way to fix any boot problems your computer experiences. But it isn’t the only solution. We’ve got a complete guide on how to fix Mac boot problems Mac Won't Turn On? How to Fix It and Make It BootIf your Mac or Macbook won't turn on, don't despair. Our guide to troubleshooting all Mac boot problems will get it fixed quickly. Read More that should help get you up and running no matter what is wrong.
By William Gallagher
Tuesday, January 15, 2019, 12:32 pm PT (03:32 pm ET)
A bundle of external drives atop a Mac mini
The T2 chip that Apple has been adding to new Macs does many things to help your computer be more secure —but one of them is an issue. By default, Macs with the T2 processor will not boot from an external drive. That's fine, that's even good, but it's an inconvenience when you want to do it. Then if the reason you want to boot from an external drive is a catastrophic failure of your internal one, it's a problem.
Apple doesn't see it like that. The company believes we all have great online connections all the time and so the official advice would be to boot from the recovery partition over the internet. Even if you can definitely do that, it's a help for troubleshooting problems. If what you really need is to carry on working, then you will have created a clone of your troublesome drive yet will not be able to boot from it.
Then just to double down on how this good security system can also be a pain, there's the issue of the keyboard. To convince your Mac to boot from an external drive, you have to first restart into macOS Recovery and that requires you to hold down Command-R as the machine boots. Only, if you have a wireless keyboard, the restarting Mac may not recognize it.
Truly, if you're booting from an external then it's to solve some problem, not to find others. So take a minute to fix this now, before you have to.
It will only get worse and also better
At time of writing, the Apple T2 Security Chip is in the iMac Pro plus models of the Mac mini, MacBook Air and MacBook Pro that were launched in 2018. You can take it for granted that it will appear in all Macs eventually.
If, for any reason, you're not sure whether the Mac in front of you has the T2 processor, you can check through System Information. Hold down the Option key as you select the Apple menu and where you normally see About this Mac, you'll see System Information.
Choose that and then in the window that appears, click on Controller in the left-hand list. If the Mac has a T2 chip, it will say so here.
Where to confirm that you have a Mac with the Apple T2 Security Chip
If your machine has it then the default is that it will not allow you to boot from external drives. Before you go fixing that, however, take a moment to check whether anyone already has.

Plug in an external drive that you know is bootable. Go to System Preferences and Startup Disk. Click the padlock and enter your password, then try to choose that external drive to boot from.
What you see if you try to boot from an external drive on a Mac with a T2 processor
You will get the same information if you're using an app such as Carbon Copy Cloner. This utility lets you automatically create a bootable copy of your current drive so that in the event of any problems, you can simply swap straight over. Ordinarily Carbon Copy Cloner will tell you that the new cloned drive will be bootable, but with T2's default settings, it can't.
Instead it will show a warning triangle and when you click on that, you get the fuller explanation.
Backup software like Carbon Copy Cloner will warn you of issues too
This is particularly significant because there are other reasons why a cloned drive may not be bootable. Apps like Carbon Copy Cloner may not be able to tell you that there's a problem because it only sees that the T2 is preventing booting. So you could be regularly creating a clone drive and only find that it doesn't work when you need it.
So fix it
Plug in a wired keyboard. Restart the Mac and hold down the Command and R keys until you see the Apple logo.
Let go of the keys while the Mac goes through the rest of this special startup sequence. Instead of the regular desktop or login windows, it will bring you to the macOS Recover screen which lists options such as recovering from a Time Machine backup.
You don't want any of the options on the the Recover screen. Instead, choose the Utilities menu and click on Startup Security Utility.
Ignore all the macOS Recovery options and instead choose Startup Security Utility
You'll have to enter your password to launch it, but then when you do, you're presented with three types of option to do with firmware passwords, secure boot —and lastly, External Boot.
This will be set to Disallow such booting but you can click on the button beneath to change that to Allow.
This is where you tell the T2 that you want to be able to boot from external drives
Choose Allow, then quit the utility. You're taken back to the macOS Recovery window. Click the red close button at top left and lastly you'll be asked about restarting.
Click on Choose Startup Disk and then pick any bootable drive you've got attached. The Mac will restart and it will boot from that drive.
It will now boot from any drive you connect over USB or Thunderbolt so you can keep an emergency clone ready to go at any time. Now you've done all this, take the time to create a backup that regularly maintains a clone of your bootable drive.
Keep up with AppleInsider by downloading the AppleInsider app for iOS, and follow us on YouTube, Twitter @appleinsider and Facebook for live, late-breaking coverage. You can also check out our official Instagram account for exclusive photos.
- Author: admin
- Category: Category
Mac won’t boot? Fancy testing out the latest macOS beta? You should try running your Mac from an external drive.
It’s a good way to help solve a lot of problems, and is easier to set up than you might expect. It works on any machine, from a MacBook Pro to an old iMac. So read on to find out to make your Mac boot from a USB drive.
Why Boot macOS From USB?
There are a few good reasons to boot macOS from a USB drive.
Before you ask for help, please try the troubleshooting steps below. Macs' support for booting from USB volumes has always been second class to. If your backup volume showed up in the Option key startup disk selection. I have an external USB SSD install with Windows 10. On my MacBook Pro 15' mid 2014 I can press option on boot and it will show up and I can boot to Windows. However when I try on my MacBook Air 13' early 2015, pressing option on boot doesn't show up the external USB SSD, only macOS partition is shown.
The most likely one is that your Mac won’t start, or has another problem. Booting from an external drive gets around this. It enables you to access the contents of your internal drive—assuming it still works and isn’t encrypted—and it helps you to repair your Mac disk with Disk Utility and other troubleshooting tools.
Another reason is so you can run different versions of macOS. This is particularly important if you’ve got crucial apps that don’t run on the latest version. It’s common for older apps to eventually become incompatible.
And similarly, it allows you to test a new version before you make the decision to upgrade. This includes trying the beta version, bugs and all. It might not be stable enough to use as your daily driver, so installing the Mac beta on an external drive lets you test it risk-free.
Note that our guide below will not build you a “Hackintosh” that can run macOS on a machine built for Windows. That requires a very different process.
What You Need
To run macOS off a USB drive, you need a drive of at least 32GB for casual use. We’d recommend one a lot larger if you intend to use it seriously.
Fast hardware is also important. This means USB 3, and either a flash drive with fast read and write speeds, or a solid state drive instead of a hard drive. You will notice a difference if your hardware is not fast enough.
You also need a copy of macOS.
How to Download macOS
There are several different ways to get a copy of macOS to install on your USB drive.
- If your Mac is running a version of macOS older than Mojave, you can download many versions through the App Store. Just go to your Purchased tab and you should see them listed among your other apps.
- In case your Purchased tab doesn’t contain the version you’re looking for, you might be able to get it via the Apple website. For example, you can download Sierra and download High Sierra from its site.
- If you’ve upgraded to Mojave (or later), unfortunately the only legal way to get the old operating systems is to buy them. Alternatively, you might still have copies on an old installation disk.
- To download the macOS beta, you first need to sign up for the Apple Beta Software Program.
When you choose a version that’s more than a few years older than what you’re currently running on your Mac you might encounter an error message saying that it’s too old to install. If this happens, there is a solution.
Head over to our guide on how to install macOS from USB How to Install macOS From USBWant to install macOS from a USB drive? We'll walk you through this alternative method for installing macOS. Read More , where you’ll find full instructions. This requires you to use the Terminal app. It’s a bit more hands-on, but still easy to follow.
Install macOS on a USB Drive
So now you’re ready to set up your USB drive to boot to macOS. First up, you need to format your drive. Connect it to your computer and launch Disk Utility.
Locate your drive in the left-hand column, where you’ll see both the device and the volume. Shareware ifotosoft photo viewer for mac windows 10. On newer versions of macOS, you might need to go to View > Show All Devices to make this show up.
Eject the volume by clicking the Eject button alongside it. Now select the device name.
Go to Erase and type a name for the drive. Set Format to Mac OS Extended (Journaled), and set Scheme to GUID Partition Map. Now click Erase. Remember that this will wipe everything on your drive.
Now download the version of macOS you want to use. If you get it from the App Store, it’ll save to your Applications folder. Shadowsocks mac client download. Double-click this to get started.
Click through the license agreement. You’ll then be asked where you want to install the operating system. Click Show All Disks and select your external drive. Choose Install, enter your password, and it’ll begin.
All the necessary files will copy over to your drive first, which might take up to 10 minutes. Then your Mac will shut down and the full installation will start. This takes a while, and the time estimate is not necessarily accurate.
In our case the estimate was 15 minutes, but the process was still chugging away after half an hour. Faster hardware is definitely a plus here.
When it’s done your, Mac will reboot into your new, pristine copy of macOS. Now you just need to set it up as you normally would. Connect to Wi-Fi, add your Apple ID info, and so on. It’s ready to go.
How to Run macOS From an External Drive
Next time you start your computer, it might revert back to booting from your internal hard drive. You’ve got two options to boot to your external drive.
Go to System Preferences > Startup Disk. Click the lock and enter your password to change the settings. Select your USB drive from the list and click Restart.
The second method is to turn on your computer and hold down the Option key. After a short delay you’ll see a list of available drives, including both internal and external ones. Choose the external drive and hit Enter to continue booting.
Both of these methods set the external drive as the default. Of course, you can only boot from an external drive when it’s connected. Therefore you can simply unplug it whenever you want to boot to your internal drive instead.
There’s one final (and important) point to know. When running macOS off an external drive, you still have to shut it down in the normal way. Don’t just whip out the USB drive, or try to eject it somehow. This could cause you to corrupt your data. You need a full computer reboot to switch from one drive to the other.
Fix Mac Boot Problems
The entire process of setting your Mac to boot from USB should take around half an hour at most. Install it on a fast SSD and you’ve got a usable dual-boot system on your hands. Or you could install macOS on a flash drive, stick it in a drawer, and keep it for emergencies.
Booting your Mac from a USB drive gives you a way to fix any boot problems your computer experiences. But it isn’t the only solution. We’ve got a complete guide on how to fix Mac boot problems Mac Won't Turn On? How to Fix It and Make It BootIf your Mac or Macbook won't turn on, don't despair. Our guide to troubleshooting all Mac boot problems will get it fixed quickly. Read More that should help get you up and running no matter what is wrong.
By William Gallagher
Tuesday, January 15, 2019, 12:32 pm PT (03:32 pm ET)
A bundle of external drives atop a Mac mini
The T2 chip that Apple has been adding to new Macs does many things to help your computer be more secure —but one of them is an issue. By default, Macs with the T2 processor will not boot from an external drive. That's fine, that's even good, but it's an inconvenience when you want to do it. Then if the reason you want to boot from an external drive is a catastrophic failure of your internal one, it's a problem.
Apple doesn't see it like that. The company believes we all have great online connections all the time and so the official advice would be to boot from the recovery partition over the internet. Even if you can definitely do that, it's a help for troubleshooting problems. If what you really need is to carry on working, then you will have created a clone of your troublesome drive yet will not be able to boot from it.
Then just to double down on how this good security system can also be a pain, there's the issue of the keyboard. To convince your Mac to boot from an external drive, you have to first restart into macOS Recovery and that requires you to hold down Command-R as the machine boots. Only, if you have a wireless keyboard, the restarting Mac may not recognize it.
Truly, if you're booting from an external then it's to solve some problem, not to find others. So take a minute to fix this now, before you have to.
It will only get worse and also better
At time of writing, the Apple T2 Security Chip is in the iMac Pro plus models of the Mac mini, MacBook Air and MacBook Pro that were launched in 2018. You can take it for granted that it will appear in all Macs eventually.
If, for any reason, you're not sure whether the Mac in front of you has the T2 processor, you can check through System Information. Hold down the Option key as you select the Apple menu and where you normally see About this Mac, you'll see System Information.
Choose that and then in the window that appears, click on Controller in the left-hand list. If the Mac has a T2 chip, it will say so here.
Where to confirm that you have a Mac with the Apple T2 Security Chip
If your machine has it then the default is that it will not allow you to boot from external drives. Before you go fixing that, however, take a moment to check whether anyone already has.
Plug in an external drive that you know is bootable. Go to System Preferences and Startup Disk. Click the padlock and enter your password, then try to choose that external drive to boot from.
What you see if you try to boot from an external drive on a Mac with a T2 processor
You will get the same information if you're using an app such as Carbon Copy Cloner. This utility lets you automatically create a bootable copy of your current drive so that in the event of any problems, you can simply swap straight over. Ordinarily Carbon Copy Cloner will tell you that the new cloned drive will be bootable, but with T2's default settings, it can't.
Instead it will show a warning triangle and when you click on that, you get the fuller explanation.
Backup software like Carbon Copy Cloner will warn you of issues too
This is particularly significant because there are other reasons why a cloned drive may not be bootable. Apps like Carbon Copy Cloner may not be able to tell you that there's a problem because it only sees that the T2 is preventing booting. So you could be regularly creating a clone drive and only find that it doesn't work when you need it.
So fix it
Plug in a wired keyboard. Restart the Mac and hold down the Command and R keys until you see the Apple logo.
Let go of the keys while the Mac goes through the rest of this special startup sequence. Instead of the regular desktop or login windows, it will bring you to the macOS Recover screen which lists options such as recovering from a Time Machine backup.
You don't want any of the options on the the Recover screen. Instead, choose the Utilities menu and click on Startup Security Utility.
Ignore all the macOS Recovery options and instead choose Startup Security Utility
You'll have to enter your password to launch it, but then when you do, you're presented with three types of option to do with firmware passwords, secure boot —and lastly, External Boot.
This will be set to Disallow such booting but you can click on the button beneath to change that to Allow.
This is where you tell the T2 that you want to be able to boot from external drives
Choose Allow, then quit the utility. You're taken back to the macOS Recovery window. Click the red close button at top left and lastly you'll be asked about restarting.
Click on Choose Startup Disk and then pick any bootable drive you've got attached. The Mac will restart and it will boot from that drive.
It will now boot from any drive you connect over USB or Thunderbolt so you can keep an emergency clone ready to go at any time. Now you've done all this, take the time to create a backup that regularly maintains a clone of your bootable drive.
Keep up with AppleInsider by downloading the AppleInsider app for iOS, and follow us on YouTube, Twitter @appleinsider and Facebook for live, late-breaking coverage. You can also check out our official Instagram account for exclusive photos.